
What if we all made different objects to skate and left them around the spots we enjoy, so others can enjoy them too? If everyone we know who skates took up the challenge, we could easily create our own DIY parks! Imagine a future where it is common to see these types of obstacles around the city. Homemade street spots everywhere we look… The whole world on wheels! I decided to create a ‘cheese’ wedge, also known as a bank or flat bank. This was a family affair, I built it with my husband and my daughter Leela helped with painting. We decided to paint it just like cheese and Leela added a little mouse. She loves to be crafty and who knows, she might get into roller skating too.
Shopping list:
-2x 12mm hardwood ply ~ 605 x 1220mm (at least)
-4x Soft wood batons ~ 35mm x 45 mm x 575mm
-1x soft wood baton ~ 45mm X 75mm x 575mm
-20 x 40 mm screws
-20 x 50 mm screws
-Tube of wood glue
-Paint if desired
Tools:
Tape measure, set square, handsaw, sanding materials, power drill!
Screw driver if you don’t have a power tool but that’s 40 screws!
Jigsaw and a power planer will make it a bit easier too, especially the jigsaw for cutting hand holes.
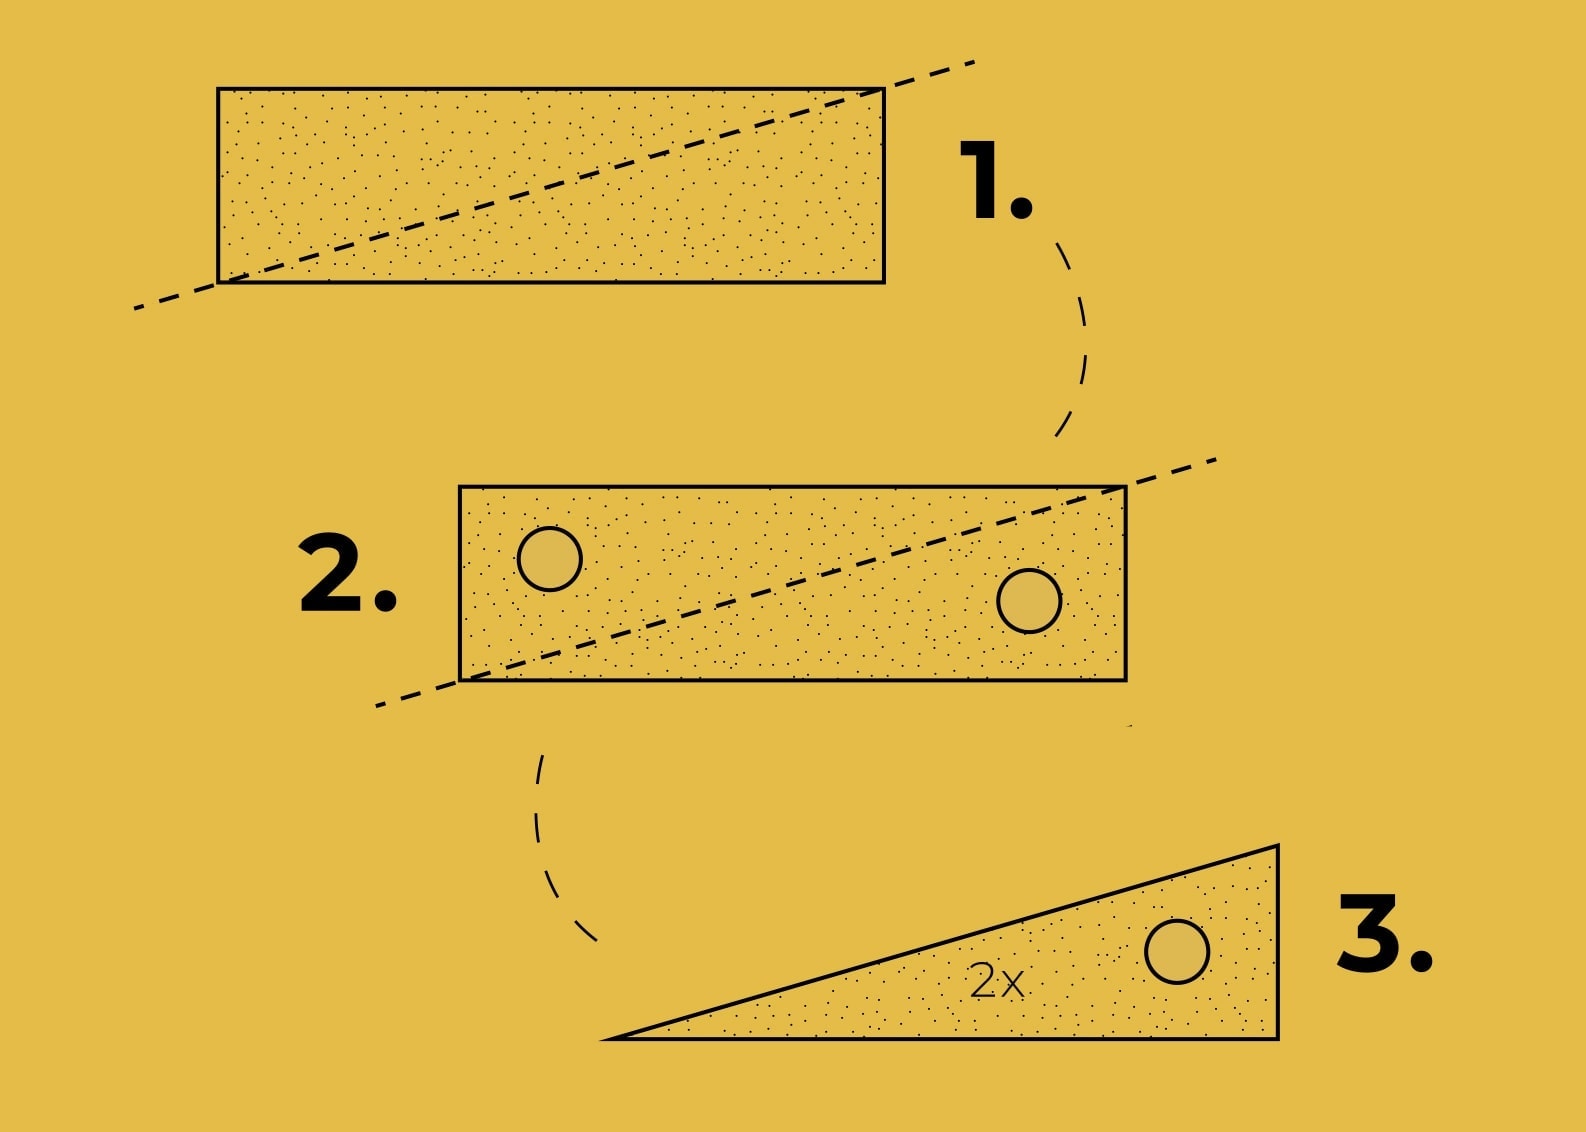
1. Start out by drawing the side panel. You could use a large piece of paper or draw it straight onto your hardwood ply. You will need two of these so cut an oblong shape 290mm x 1120mm on your ply wood and then cut diagonally from corner to corner.
In 2 and 3 you see holes cut out. These will be handles. Skip this if you don’t want to add handles or you don’t have a jigsaw. Overlap your 2 side panels and screw together. Now you can make a hole using your jigsaw and the 2 holes will match on your left and right sides.
Sand down all the sides, edges and inside the holes.
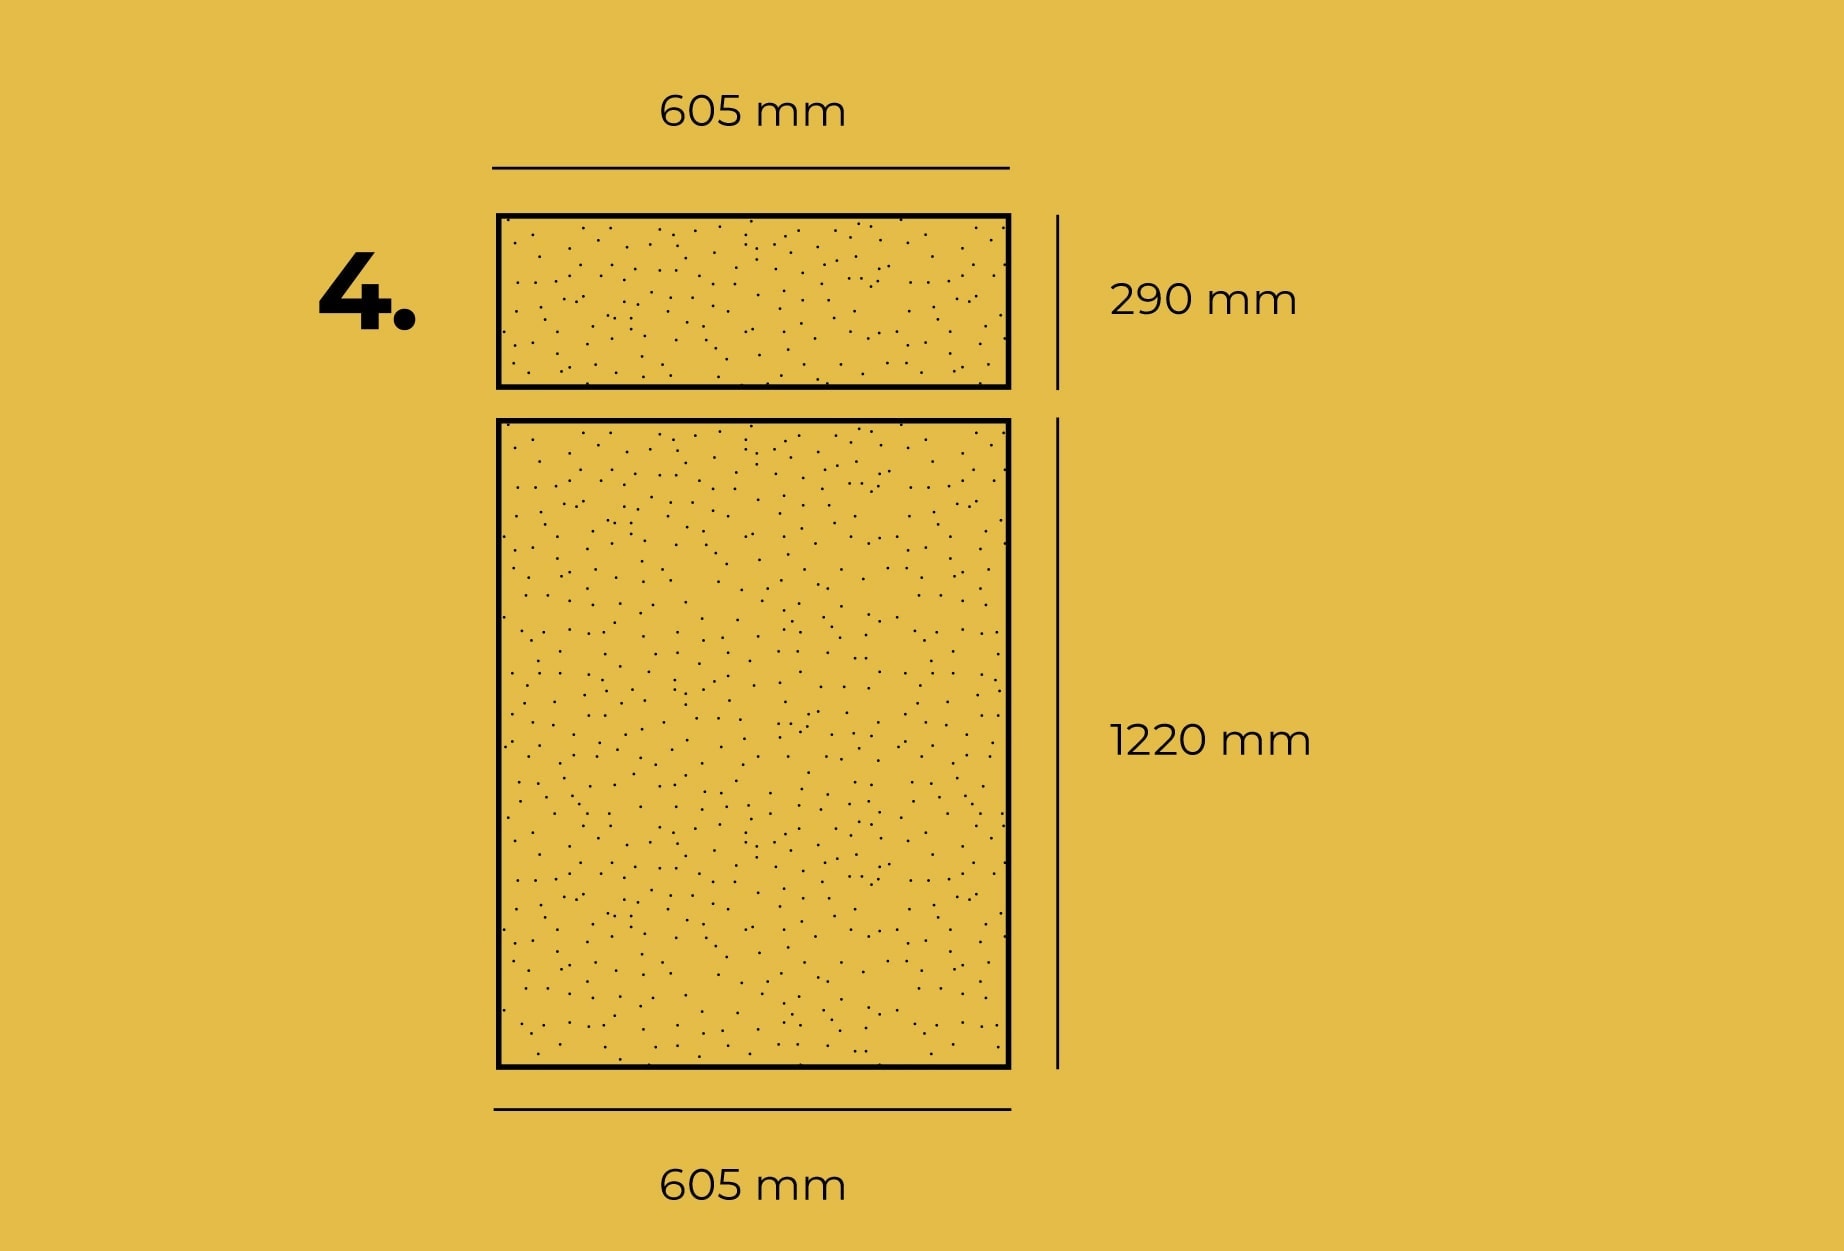
4. We will next need to cut out the end panel and then the flat back section of the ramp. The end panel measures 605 mm x 290 mm and the bank section 605 mm x 1220 mm.
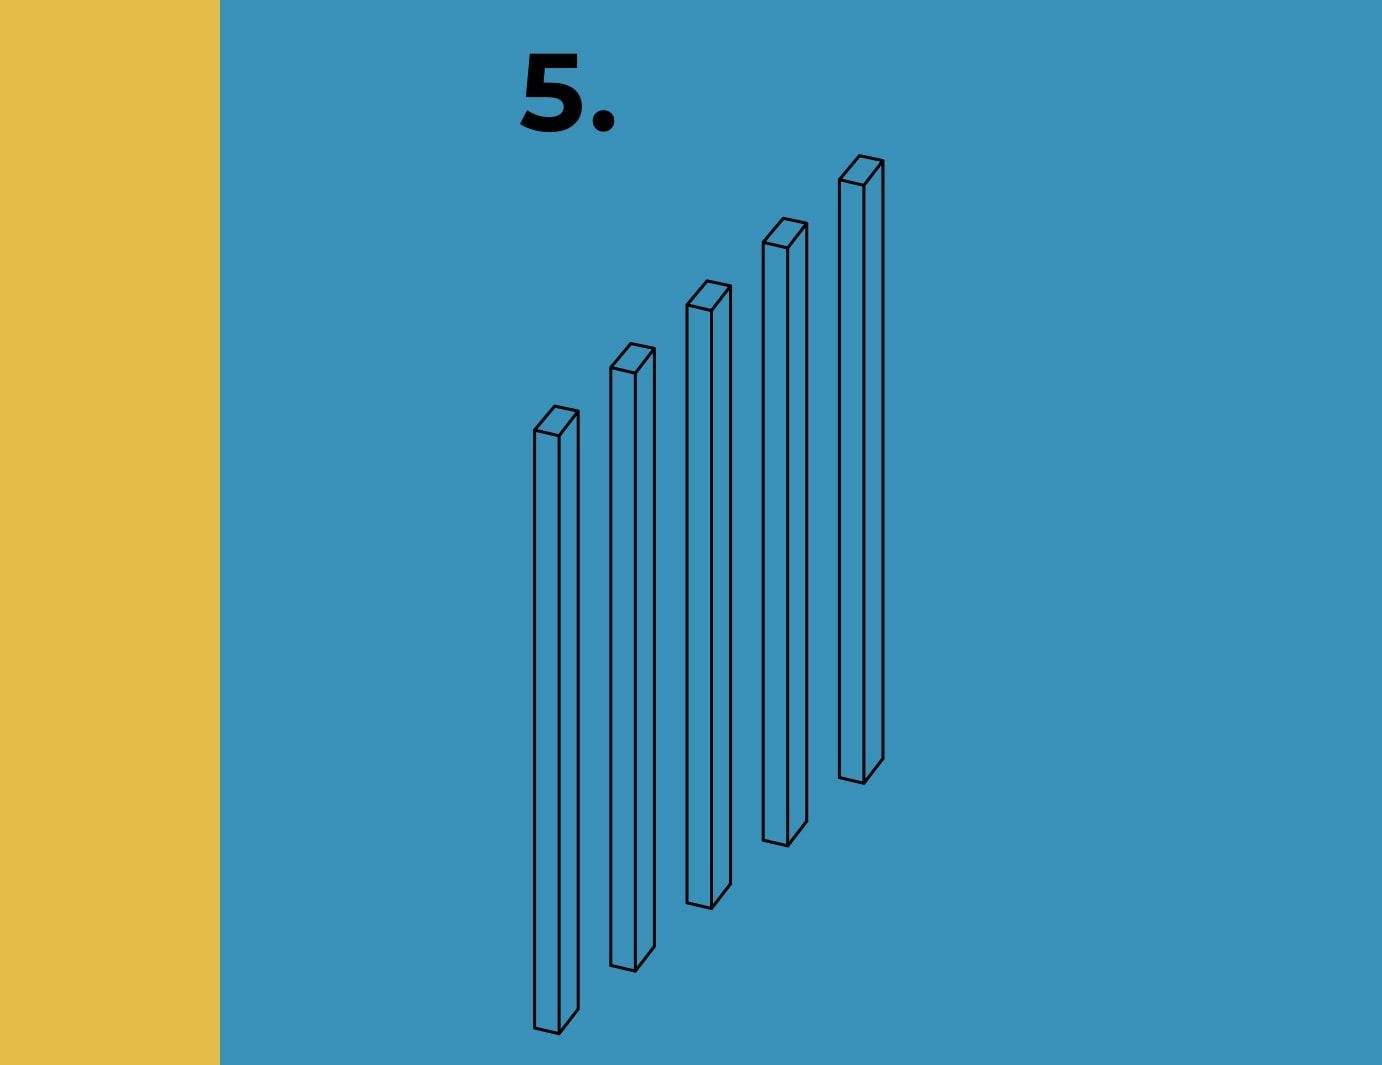
5. Cut the batons that support the whole structure. We need 4 x 575mm x 35mm x 45mm. You may need to cut from larger pieces of wood depending on how you bought it. You also need a baton that is a bit thicker. 575mm x 45mm x 75mm this will be at the floor of the end panel to support the structure.
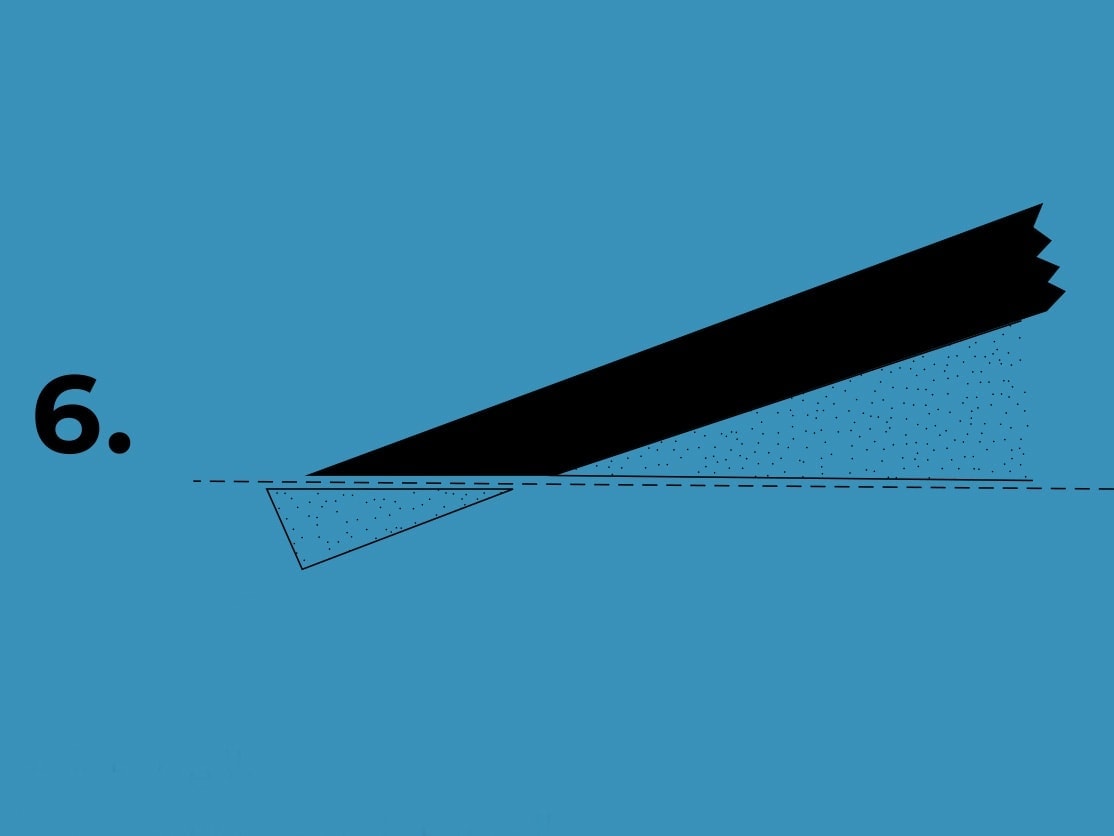
6. There are lots of options to finish the bank to sit flush with the floor. You can use a thin strip of metal but we thought about budgets and keeping the integrity of the wood so we bevelled the end of the ply…take a look. You can use a plane to do this. It should sit flush with the side panel.
7. It is now time to screw this all together. Pre-drill the holes in all the ply wood pieces. Lay all the pieces out like this and mark up the ply wood to match the batons and panels. Use a tape measure and the set square to make it accurate. Add blobs of wood glue to the wood before you screw the section together. For maximum strength place the baton on its thin side to the ramp.

8. Putting it together
Add glue to the longest line of the side panel. Stand it upright and screw the batons to the side panel. Make sure you have two holes to drill though and are drilling to the deepest end of the baton use the 50mm screws. When all 4 deck batons are in place, screw the thicker baton to the top corner of your side panel with two 50 mm screws. This will eventually sit on the floor.
Lay the side panel down so you have the baton ends facing up. Glue up the other side panel and lay it on top. Locate the holes and screw together with the 50 mm screws.
Place the frame flat on the floor (thicker baton should be on the floor with the thinner batons at the top) and once you have glued up the end panel, screw it to the frame with 40 mm screws.
Now glue up the narrow ends of the batons and the edges of the side panels. Place the deck of the flat bank on top and screw together with the rest of the 40 mm screws.
That is it. You are now ready to ride or paint!
If you need more inspiration, check out DogDays Yeah!Book where you find the wedge instruction with beautiful illustrations by Anke Dregnat. If you need a rail build manual, have a look at our DIY issue.

Watch how Sam & Dek put the wedge together:
Words & Wedge by Sam Kent